CCC Architecture
Programs in Architectural Studies at the City Colleges of Chicago
How to Make a Sketchbook
This exercise introduces the sketchbook as a tool for recording, reflecting, and developing
ideas. The exercise will walk students through the process of constructing a sketchbook.
Objectives
Students will:
1. Acquire the skills to assembly a bound sketchbook.
2. Develop a sense of craftsmanship in the assembly of a sketchbook.
3. Acquire an appreciation of the sketchbook as an artifact.
Materials
- A. 50 or more sheets of paper, in multiples of 5 (50, 55, 60, etc.;) In the example, 9" x 12" sheets of 50 lb. Strathmore sketch paper are used.
- B. Fabric or paper for cover. The cover should be at least 3" taller and 4" wider than your sheets of paper. If you are using 9" x 12" sheets, the cover should be at least 12" x 16".
- C. +/- 1/16" thick chipboard or other board material. You will need a sheet that is about 2" larger than your sheets of paper. If you are using 9" x 12" sheets, the board should be at least 11" x 14". This board will be covered so the color doesn't matter.
- D. Glue. In the example, Sobo craft and fabric glue is used. There are other glues available that are intended for bookbinding.
- E. Binding thread

Tools
- F. Needle for threading. The needle needs to have a large eye so it can receive the binding thread.
- G. Metal ruler for measuring and using as a cutting edge
- H. Triangle for making perpendicular lines
- I. Pencil for marking
- J. Exacto or other knife to cut the board
- K. Bookbinding awl for making holes (a hammer and nail will work as well)
- L. Heavy book or other object to serve as weight.
- M. Block of wood on which to pound holes
- N. Cutting board

Procedures
1. Making the signatures
1.1. Stack 5 sheets of paper.
1.2. Fold the stack in half. A single stack is called a signature.
1.3. Repeat until you have stacked all of your sheets into signatures.
2. Preparing the signatures for threading.
2.1. Unfold one of the signatures.
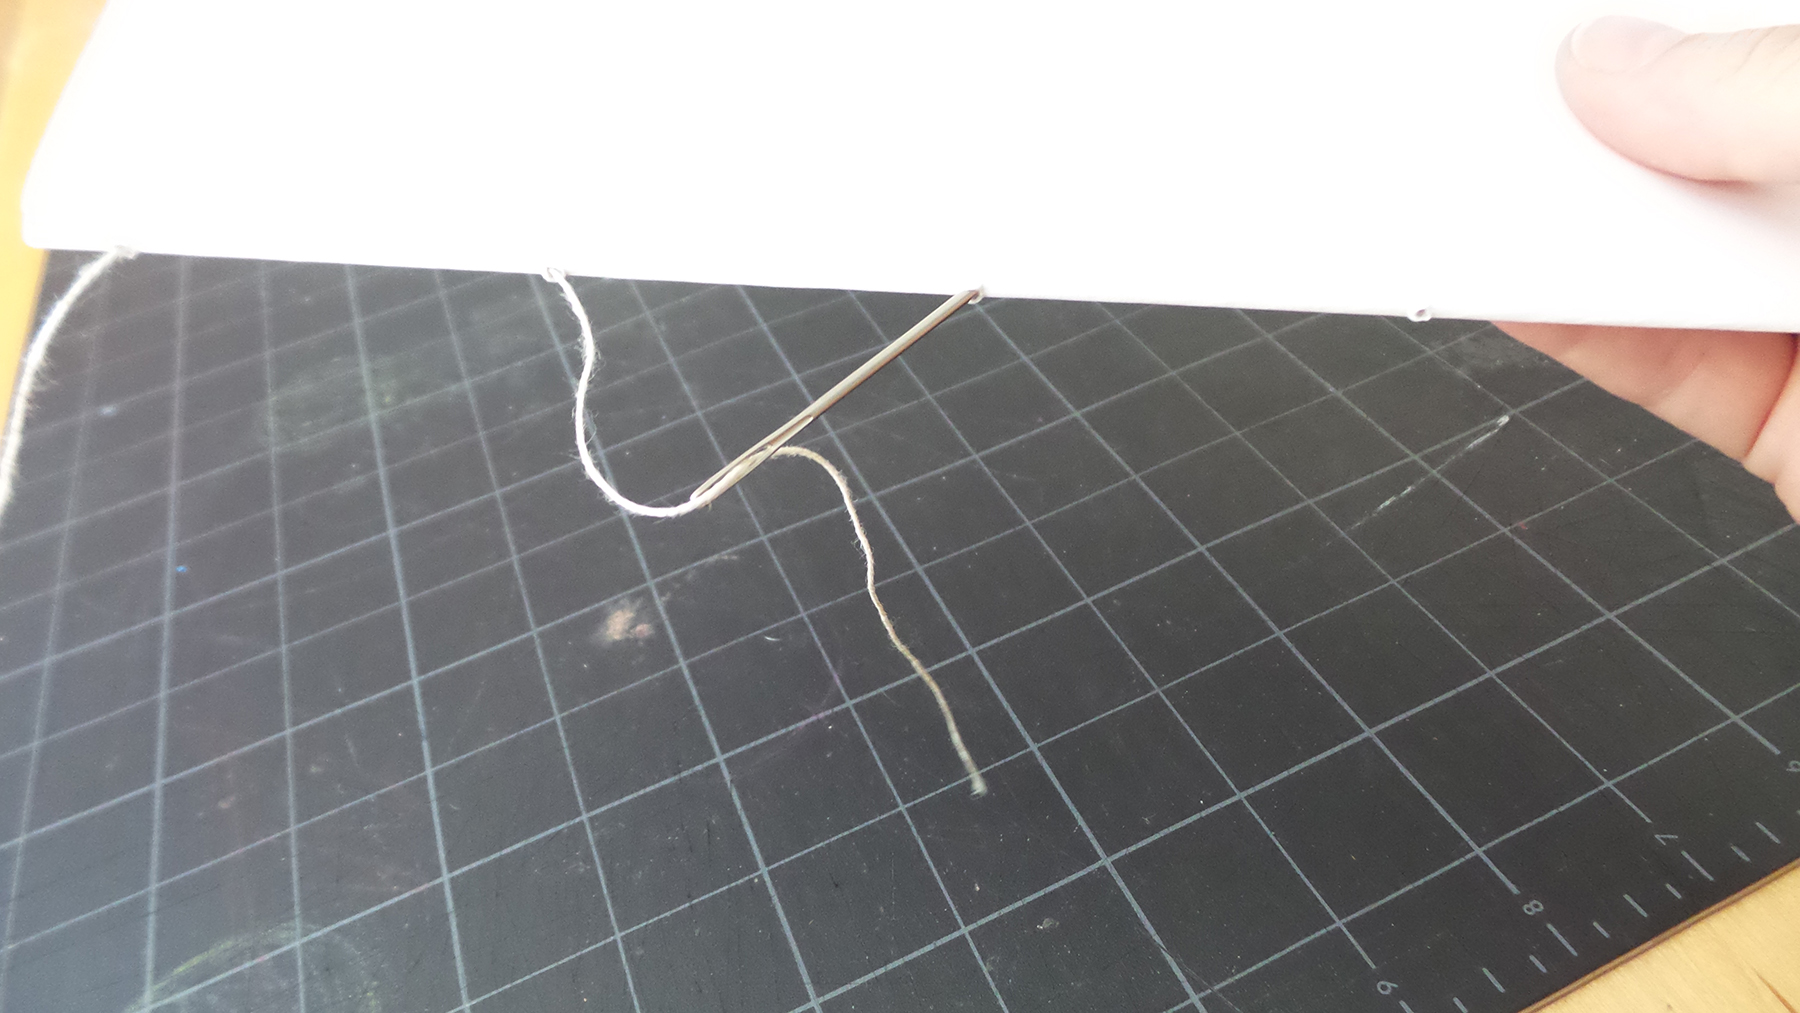
2.2. Mark locations for holes in the locations shown below. Leave at least 1/2" from the edge to the first and last holes.

2.3. Place holes at your marks using an awl or hammer and nail.

2.4. Use the first one as a template for the other signatures. The holes need to be in the same location for all signatures.
2.5. Make holes in all of the signatures as described above.
3. Making the Text block
3.1. Cut a piece of binding thread that is (the length of your text block from top to bottom) x
(the number of signatures) x 2. If, for example, your text signatures are 9" and you have 10
signatures, the length would be (9" x 10 x 2) = 180”.
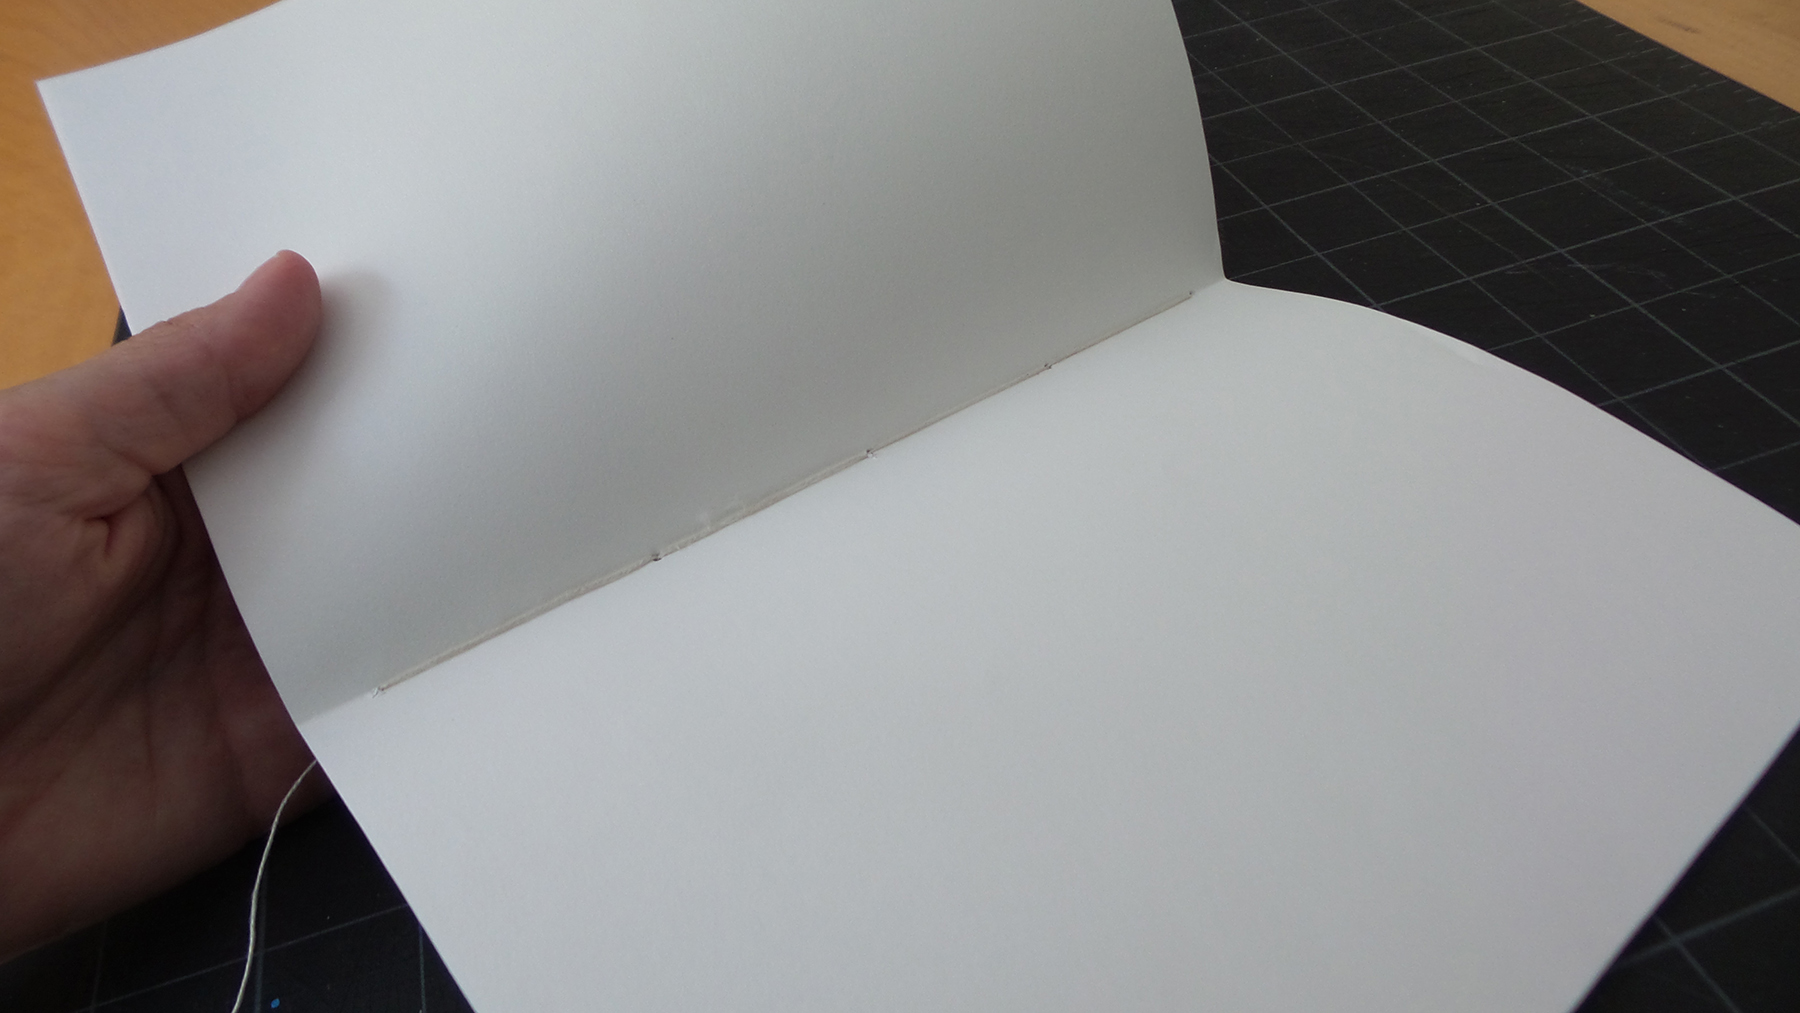
3.2. Begin stitching at one end of one signature.

3.3. Weave in and out of the holes.
3.4. Continue to the last hole.

3.5. And then return back to where you started.

3.5. Check to see that the inside of the signature is tight.
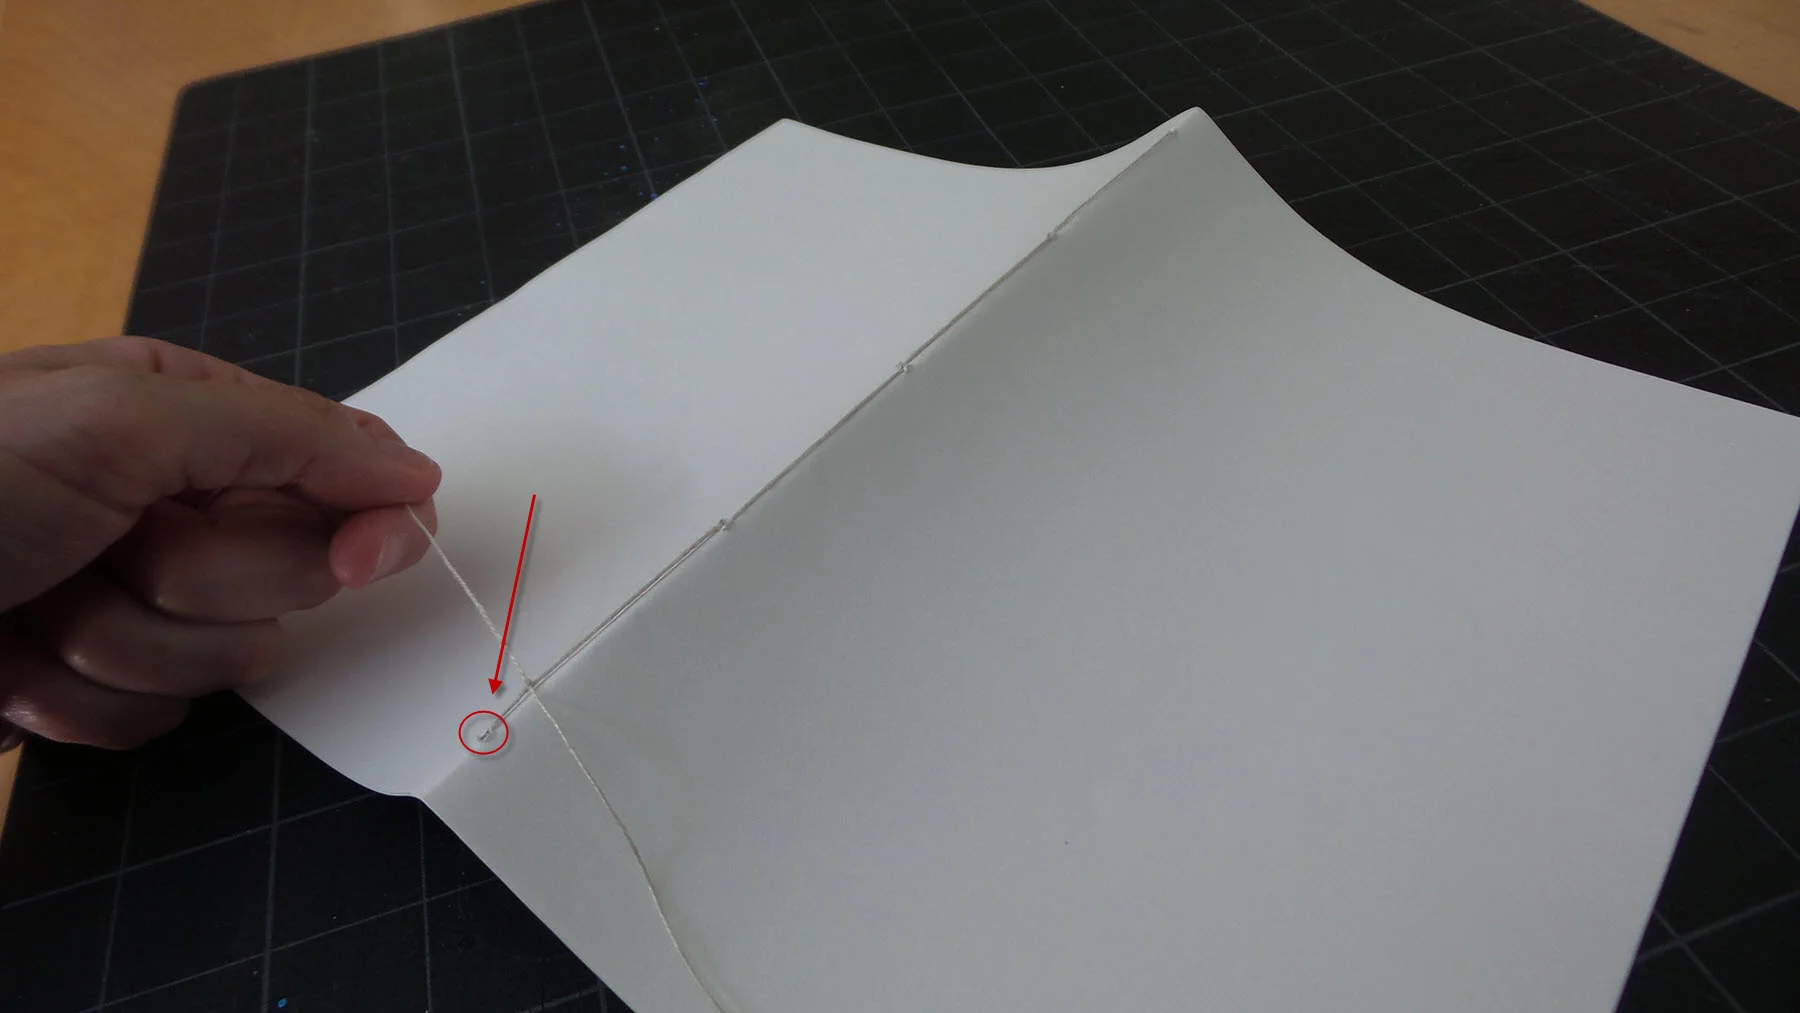
3.6. Tie a knot when you get back to your starting point. The best place for the knot is at the hole shown with red circle and arrow.
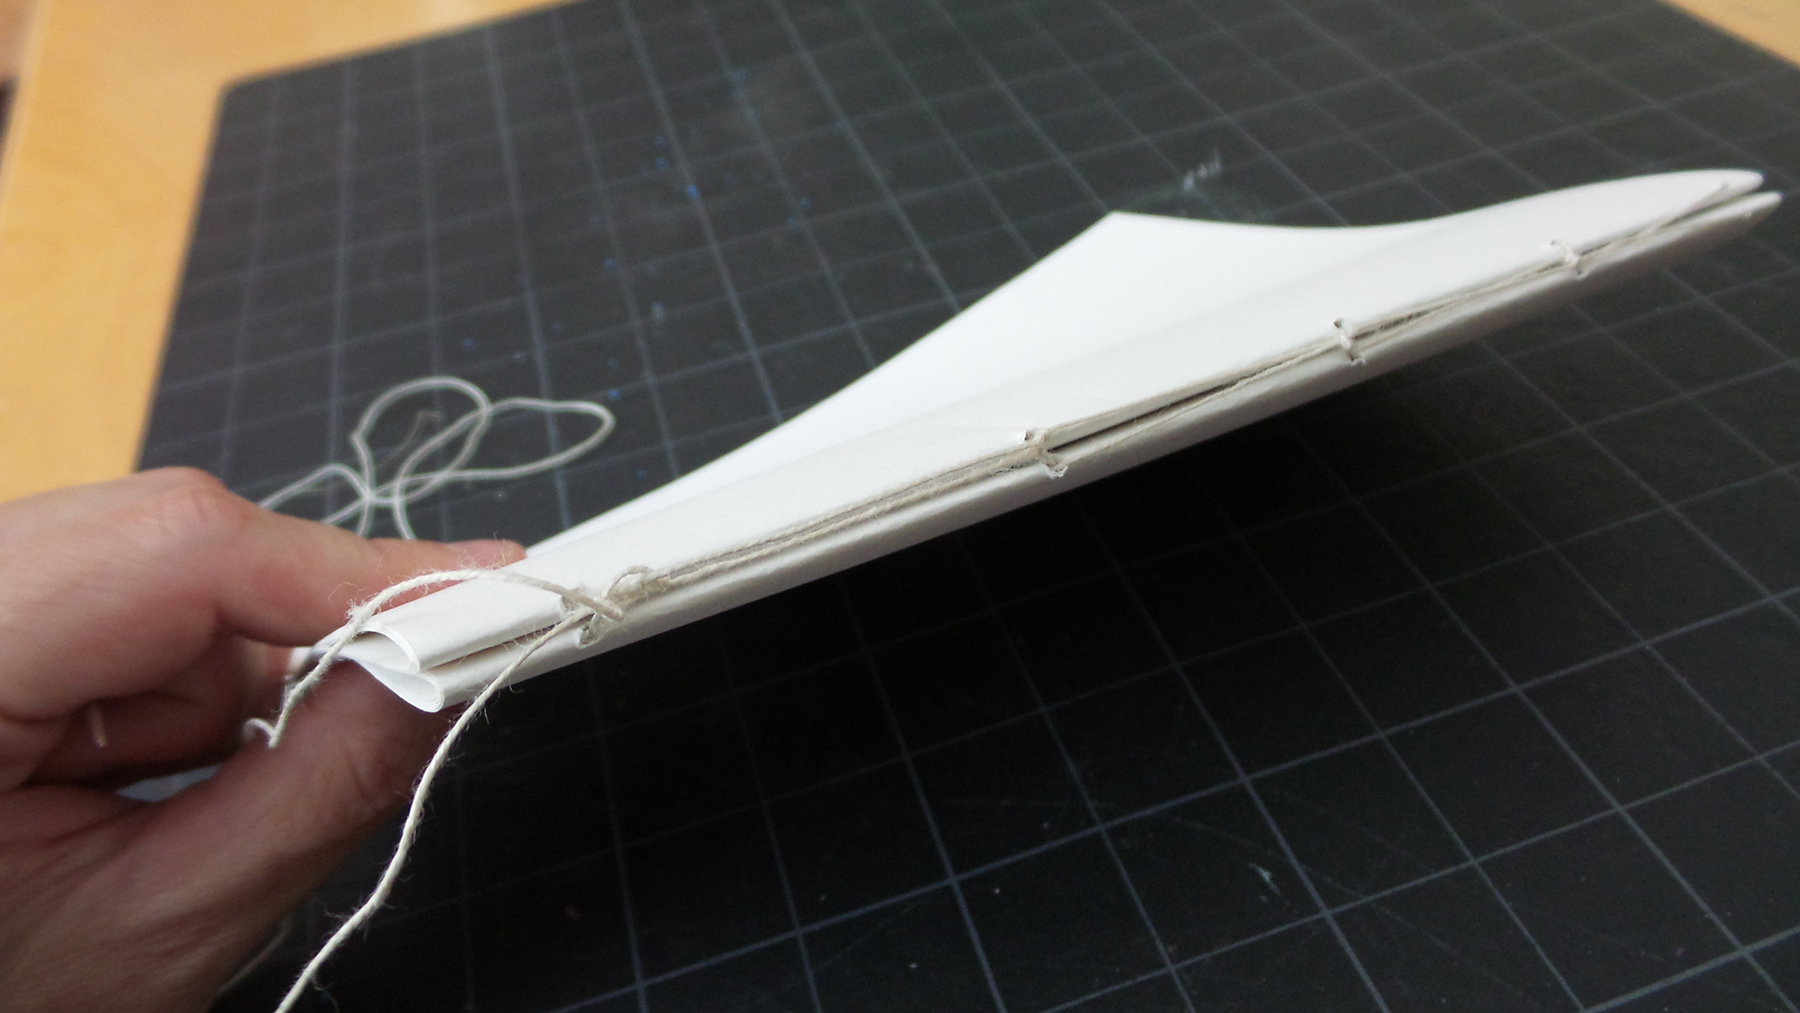
3.7. Place the next signature on top of the stitched one. Feed the thread through the first hole.

3.8. Pull the needle through the next hole.

3.9. Tie a knot at the second hole.

3.10. Continue weaving through the holes. Form a knot every time you enter or exit through a hole. All knots should be placed on the outside of the stack. When you open the stack no knots should be visible. Do your best to keep the stack tight.
3.11. Continue stacking the signatures. If you need more binding thread you can splice with the thread you have started. Splice knots need to be outside of the stack.
3.12. The stack should be nice and tight. Add extra knots if necessary.
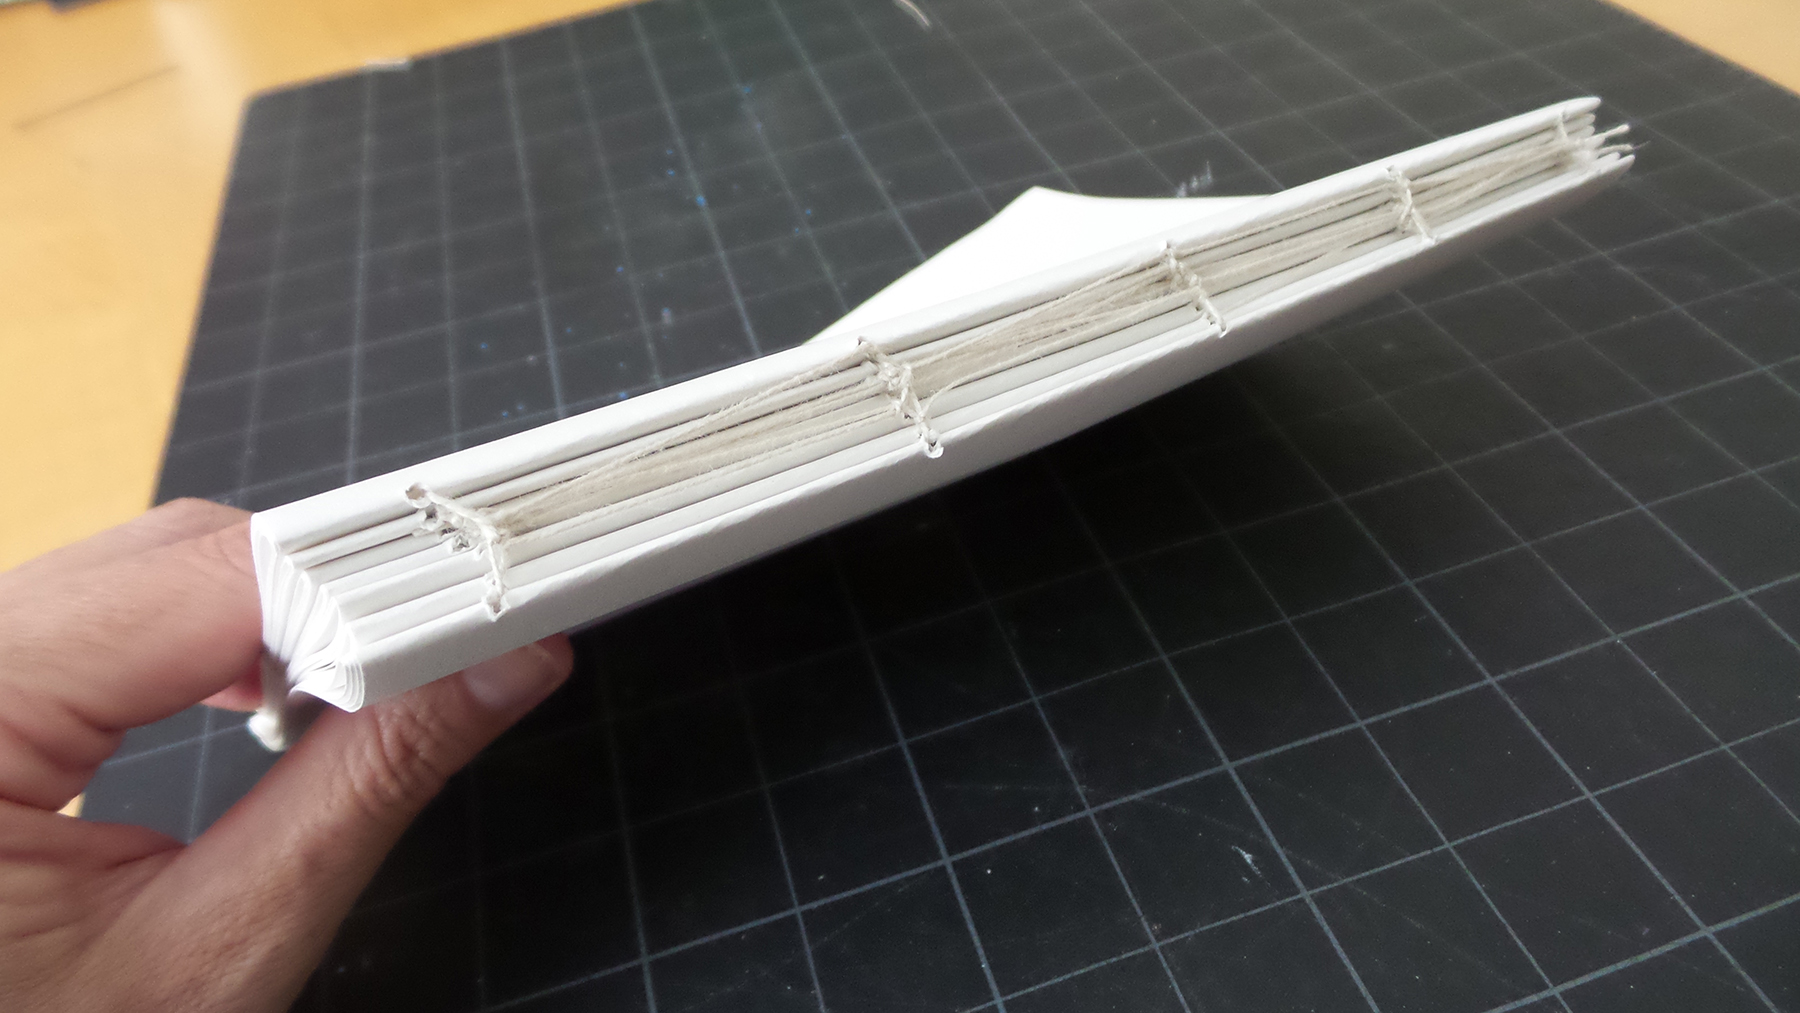
3.13. The stack of signatures stitched together is known as the text block.
4. Gluing the Text Block
4.1. Place the text block at the edge of the table. Place a heavy object like a book on the text block. Add glue to the edge. Spread the glue with your finger to make sure the edge is well covered. Use care not to let glue see into the text block or on your heavy object.

4.2. Allow the text block to dry for a day.
5. Board for the Cover Structure
5.1. While the text block is drying you can work on the cover. Three pieces of board will serve as the structure for the front, back and spine.
5.1. Using the ruler, pencil, and triangle measure a piece of board for the back. With an Exacto knife, cutting board and metal ruler cut out the piece. It should be about 1/4" larger than the text block on three sides as shown below.

5.2. Cut another piece that is the same size for the front.
5.3. Cut a piece of board to be used as a spine. The length of the piece should be the same as the covers from top to bottom. The width should be the same height as the text block.

6. Cutting the Cover
6.1. Lay the cover material face down. Place the boards for the on the back of the cover with 1/4" between the spine and the boards for the front and back covers as shown below.
6.2. Measure a 1" border all around. Mark 45 degree angles at the corners, but leave 1/8" or 1/4" at the corners.

7. Gluing the Cover
7.1. Place the boards on the cover as shown above.
7.2. Remove one of the board pieces and apply glue to it. Drip glue onto the board (below, left). Spread the glue evenly using scraps of board (below, right).

7.3. Quickly replace board onto the cover (glue side down). Take care to position the board because it is not possible to change this later. Do your best to keep the cover smooth.
7.4. Repeat for the other two pieces.
7.5. Place another heavy object on the boards for a few minutes.
7.6. Apply glue around the edge of the cover, except just above and below the spine. Spread the glue with a scrap of board.
7.7. Fold over the top and bottom. Smooth the cover. Next fold the sides over. If there is extra cover material at the corners, tuck it in.

7.6. Place a heavy object on the cover piece and allow it to dry for a day.
8. Gluing the Text Block to the Cover
8.1. Place the text block on the cover. Try aligning the text block with the inner edge of the board material (orange arrow below).

8.2. Flip the cover over to check the fit.
8.3. When everything looks good, put the cover back as shown above.
8.4. Apply glue to the top of the text block. Be careful not to over apply glue. Smooth it out with a scrap of board material.
8.5. Flip the cover back into closed position.
8.6. Turn the sketchbook over and repeat on the other side.
8.7. No glue should be placed on the spine.
8.8. Place a heavy object on the sketchbook and allow it to dry for a day.
